Go to WooCommerce > Settings in your WordPress admin. On the Products tab, under the Display settings, ensure that Default Product Sorting is set to “Default sorting (custom ordering + name)”. Save the setting, then click on the Products admin page from the WordPress admin sidebar.
Note: This Setting has now been moved to the CUSTOMIZER under Appearance, Customize
Custom Sorting
All custom sorting is applied against all items and not against separate categories. Keep this in mind if you have a page that displays all products. If you only want to custom sort on Page displaying one particular Category, the sorting options don’t need to be as detailed as on a Page displaying ALL Products from ALL Categories.
From the Products admin panel, you can select Sort Products and then drag and drop your products in the specific order that you’d like. You can also order the products in the Quick Edit menu by changing the “Order” value. All items default to the value zero. The custom order displays the lower numbers first. You can also edit the order value in the Product Data > Advanced tab on the product edit page.
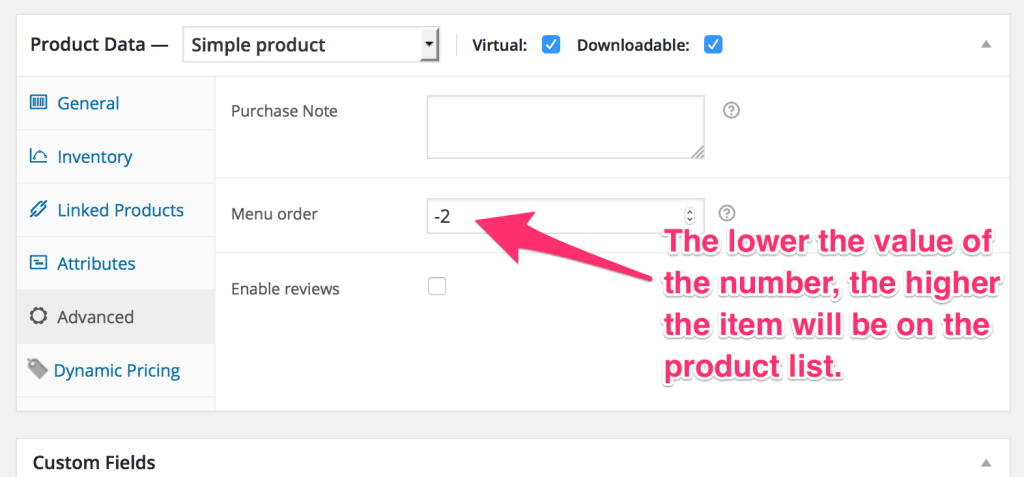
Move Specific Products to the Top
If you want to custom sort each and every product, you may do so. If you simply want to move a few select items to the top of the list, there is an easy way to do that.
Enter a negative number in the “Order” field of the product. By using a negative number, the item will have a lower value than the default “0” and therefore will show above those items. If you want to lump a group of products together and have WooCommerce sort them alphabetically, just use the same “order” value.