How to add a Virtual Product to your Woo Commerce Shop online
In addition to physical products which you post to your customers, you can also add virtual products which aren’t tangible and which your buyers then access via a download or a link. WooCommerce offers two types of intangible products: virtual and downloadable.
Sometimes a product might be virtual and sometimes it might be both virtual and downloadable, for example:
- a website subscription would be virtual but not downloadable
- a service would be virtual but not downloadable
- an e-book would be both virtual and downloadable
In this tutorial, we set up both of these products to demonstrate how you add virtual and downloadable products.
What You’ll Need
To complete this tutorial you’ll need:
- an installation of WordPress, with Administrator access
- the WooCommerce free plugin installed and activated
- WooCommerce settings configured.
Adding a Virtual Product
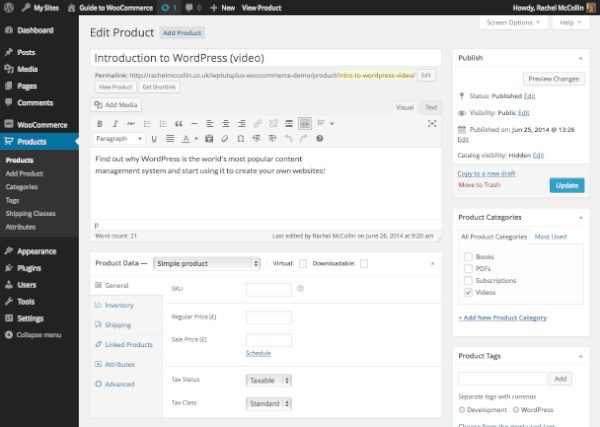
First, You need to add a new product via the Products->Add New screen, and give it a title, description and product image:
Product Data – General
Next, in the product editing screen, you can configure the Product Data metabox. Start by defining the product as virtual by ticking the Virtual checkbox. This makes the Shipping tab disappear.
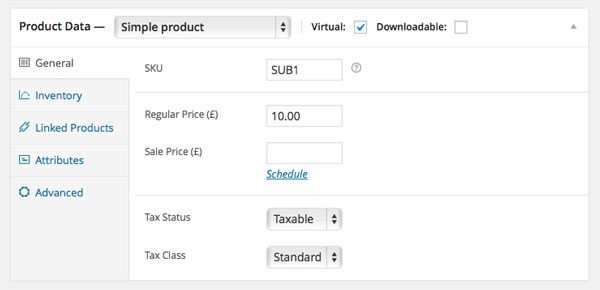
In the General tab, add the price, SKU and tax rate as with any other product.
Product Data – Inventory
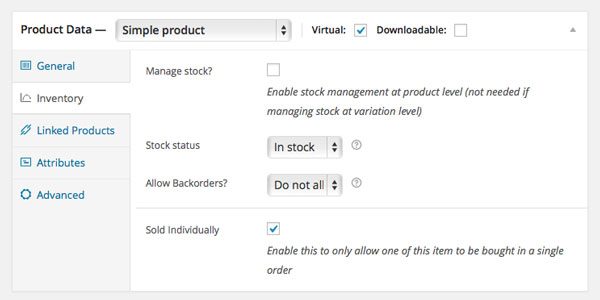
As this is a virtual product, you don’t need to manage inventory, so deselect the Manage stock? option in the Inventory tab:
Product Data – Advanced
For this product we do not need to add any linked products or attributes so we will move on to the Advanced tab:
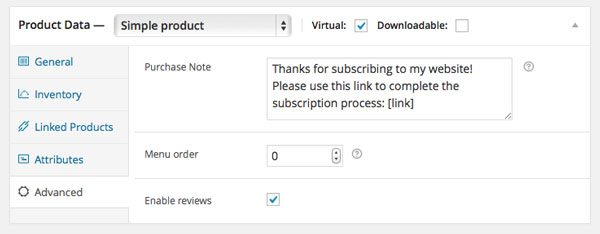
Here you can add a note which will be sent to anyone buying this product. As this is a subscription you can provide a link which buyers will need to follow to complete the subscription process.
Finally, click Update to save the changes to the product and view it.
Adding a Downloadable Product
Virtual products aren’t all that different from physical products in the way they’re set up on your site: the only difference is that they can’t be posted to your Customers. Downloadable products are more distinct from physical products as you have to set up the download process.
To create a downloadable product, first set up the product as you would any other product type, giving it a title, description and image:
Then in the Product Data metabox, select both Virtual and Downloadable.
Product Data – General
Once you’ve done this, the Shipping tab will disappear and the General tab will expand:
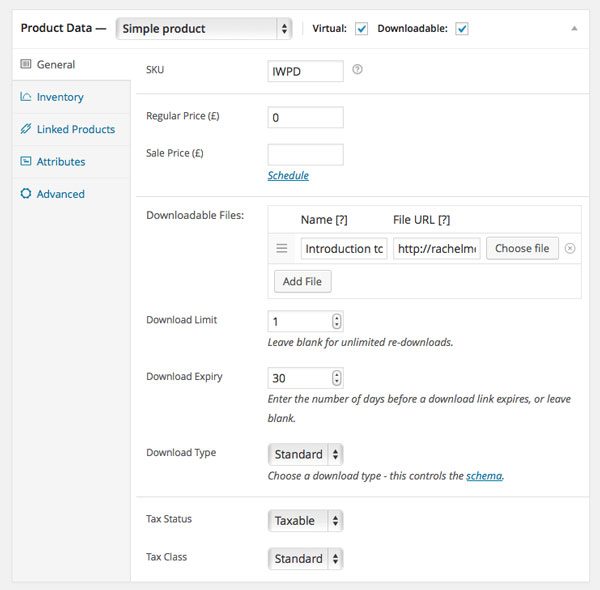
As well as adding the usual price, SKU and tax details, you also need to add download details. You can do this in one of two ways:
- Input a link to the file for download, which is the best option if the file is very large, if it is hosted elsewhere or if you’ve already uploaded it via the media manager in WordPress.
- Click the Choose file button to upload the file to your shop. This will be useful for smaller files you want to host on your own site.
Product Data – Inventory
As the product is not limited by stock numbers, you need to turn off stock management in the Inventory tab:
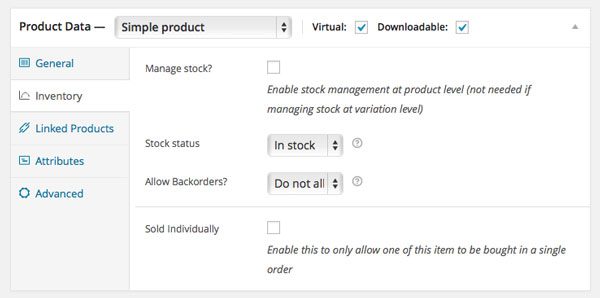
Simply uncheck the Manage stock? checkbox to disable this feature. In some cases you might want to enable stock management, for example if you’re selling tickets to an event.
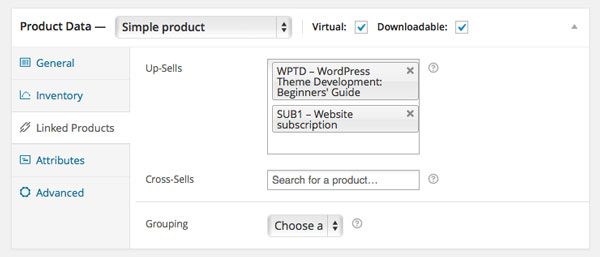
Product Data – Linked Products
You can add linked products to downloadable products in the same way as you would for physical products, and these don’t have to be other downloadable products.
Product Data – Attributes
The next step is to define attributes for your product, using the attributes you already set up when configuring your product settings:
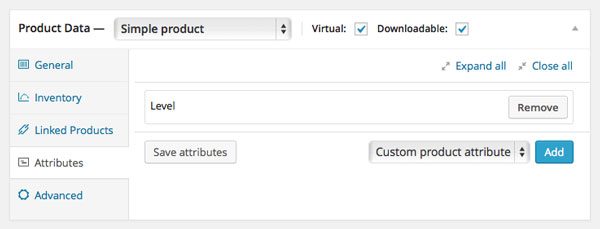
For each attribute you want to select terms from:
- Select the attribute from the Custom product attribute drop down box.
- Click Add.
- Click the Value(s) field and select the relevant term(s) from the drop down box.
Note: You can add new attributes here by selecting Custom product attribute before clicking Add, and then entering the details of your new attribute. This will add the attribute to the list in your Attributes screen. But don’t forget that attributes are taxonomies, not terms, so don’t use this method to create new terms for an existing attribute.
Example here: Added a term from the ‘level’ attribute.
Product Data – Advanced
The final tab is the Advanced tab:
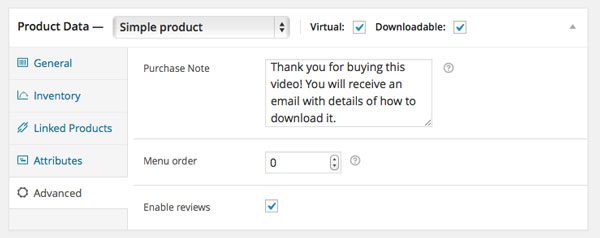
Here you can add a note which buyers will see after purchasing the product, define whether reviews are enabled and specify a menu order for ordering your products in archive pages.
Once you’ve done all this, click Publish and view your product:
As you can see, the product has linked products displayed and as I set the price to 0, it’s showing on the product page as Free!.
Downloadable Products – the Purchase Process
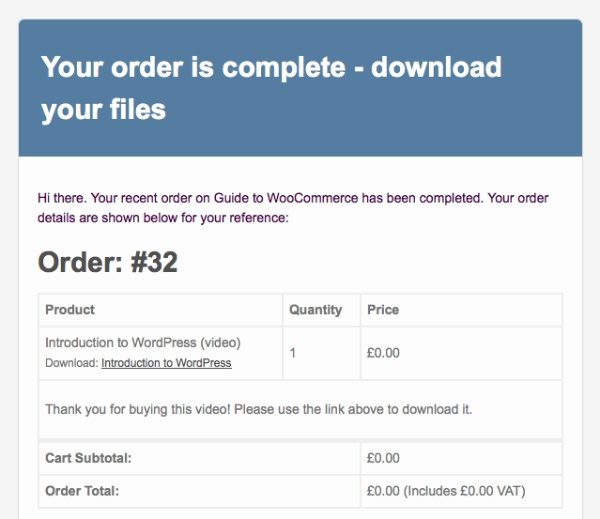
When someone buys your downloadable product they will receive a link which they can use to make the download. They will see this on screen after making the purchase and also receive an email:
Here’s what buyers will see after a successful purchase has gone through
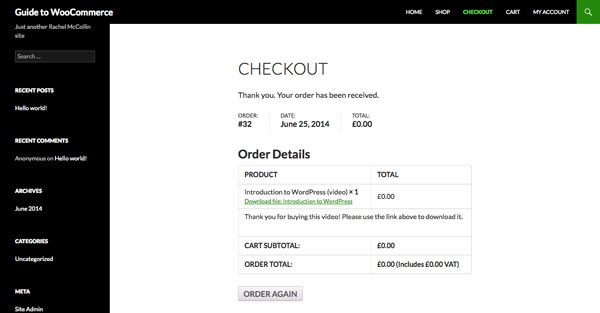
As you can see, there’s a link displayed which they can use. As I set the download limit to 1 in the Product Data – General tab, they will only be able to use this link once. This prevents buyers from sending the link to their friends.
Buyers will also receive an email with the link:
The Colors and Layout of the Email can be further customized.